
The final sanding of a wooden floor is arguably the most important step. This often dictates the look of the final finish so we take the utmost care at this stage.
Here are some tips for the final wood flooring sanding step.
5 Tips for the Final Wood Flooring Sanding Step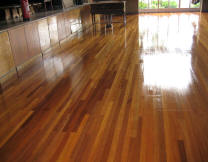
1. The grit of the abrasive used for the final sanding step depends on the wood species and how you sanded the floor up to that point, what grit sequence you used to get there.
2. Wood flooring generally must be sanded with a finer grit when oil or wax is being used. The grit sequence must run accordingly to include finer grits.
3. The deeper the sanding marks, the more oil or wax can penetrate and make these indentations appear dark. Deep sanding marks are much more visible than with finishing sanding. The usage of colored oils and stains will even reinforce this effect.
4. An even and fine surface structure of the wood flooring is particularly important for colored oil or stain. The deeper the sanding marks, the more color pigments can deposit in them. The sanding marks therefore appear even darker than with normal oil. A surface treated with colored oil or stain is therefore generally sanded with one grit number finer than with other treatments.
5. But it is up to the contractor to make the call on whether the surface quality following the final sanding step is suitable for the planned surface treatment. Make sure to follow the finish manufacturers’ instructions.
Get in touch with us on 01788 569980 or email us on our contact form.